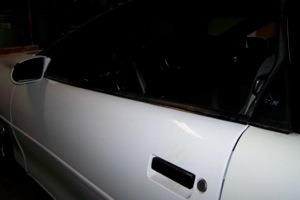
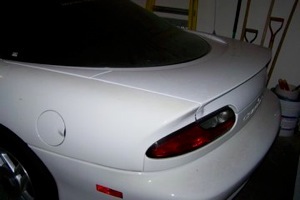
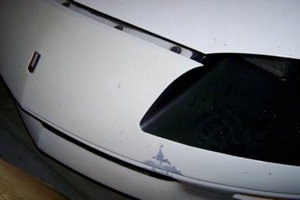
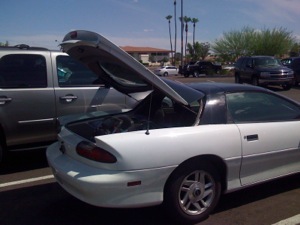
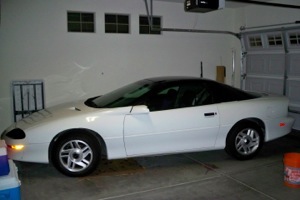
Before Pics - Summer 2008

Over the next couple of years I want to transform this former Hello Kitty Mobile into a Smokin’ Hot tribute to my favorite team - The Phoenix Suns!
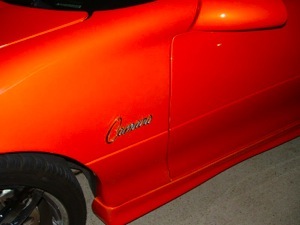
This 1995 Chevrolet Camaro was my first car - I purchased it from my uncle and grandpa when I turned 16 in 1999 and had it completely paid off before I graduated from high school. Back then it sported pink Hello Kitty seat covers and floor mats, a pink rearview mirror, Hello Kitty decals, and other pink accessories. I want to turn the teenaged girl car into a classy custom adult car.
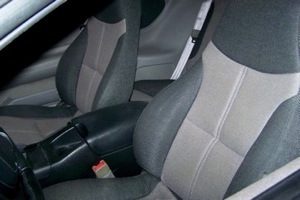
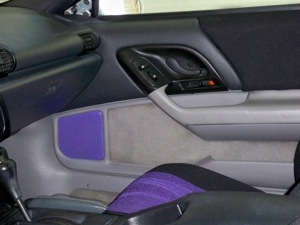
New Upholstery - May 2009
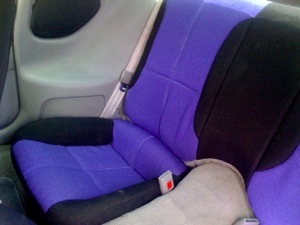
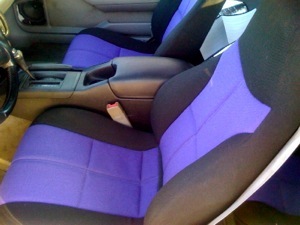
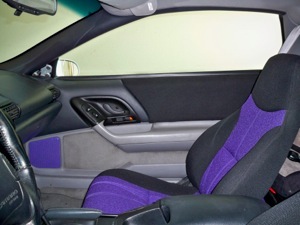
The work begins Spring 2009!!! As a birthday gift, my grandpa helped me get new custom upholstery. My original upholstery had been damaged several times (rips, cuts, cigarette burns) by reckless mechanics that had done random work on the car. It also felt dirty since it was about 15 years old. I picked out the purple & black fabric at Tempe Sales. My grandpa’s upholsterer was not so sure about black & purple with gray in there, but gray is one of the Suns’ colors now, and I am planning on getting black floor mats, etc. so I told them to do it anyway. I absolutely LOVE the way it turned out! Grandpa also got me 4 new tires :)
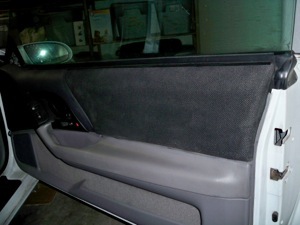
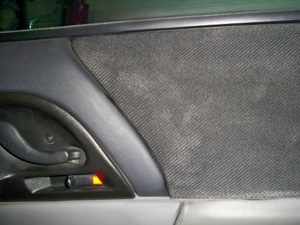
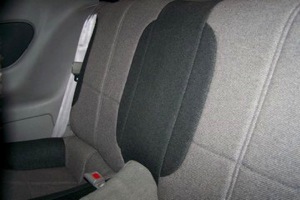
One thing I was really disappointed about with the upholstery is that they couldn’t (or wouldn’t) re-do the fabric on the door panels, so the upholsterer dyed the gray striped fabric on the doors “black”. It looked even worse - faded and dirty - and it felt rough and crusty. I went back to Tempe sales and bought another yard of the black fabric and I re-covered them myself with some spray adhesive, a putty knife, and a flat head screwdriver. I couldn’t actually take that part of the door panel off myself, so I just tucked the new fabric behind the panel after adhering it to the old fabric.
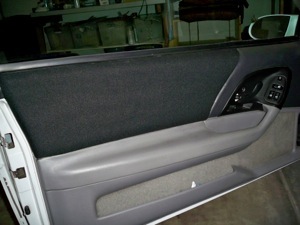
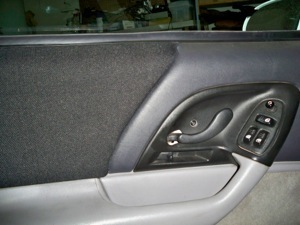
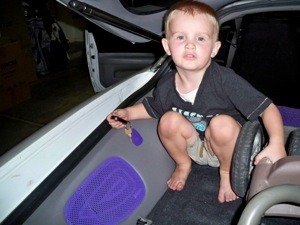
While working on the door panels, I really got excited about doing something custom with the speaker covers/grilles. I thought about covering them with a thin purple spandex fabric, but I couldn’t find the right color. I then decided to attempt to spray paint them purple. I started with the broken speaker grille in the rear hatch area because I knew I would have to replace it anyway. I ended up liking it a lot, so I went ahead and did the speaker grilles on the door panels, and my little man, Jax, helped me out.
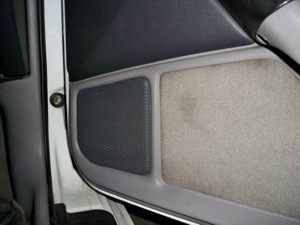
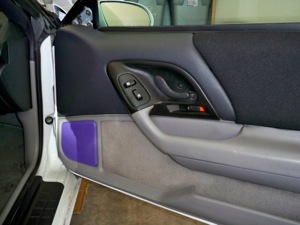

Door Panels - June 2009
Speaker Grilles - June/July 2009
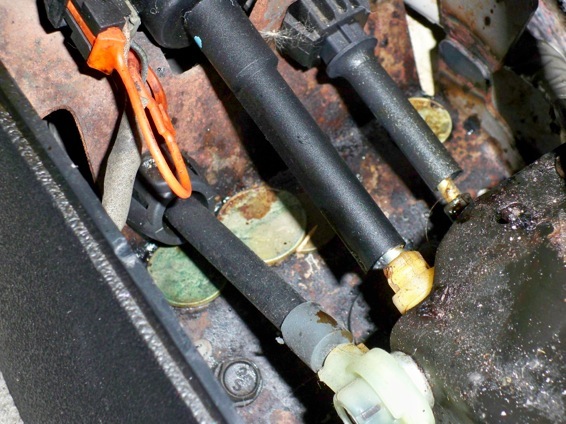
My rear hatch struts had been shot for years. One of my uncle’s buddies did me a favor by looking over the whole engine and AC to make sure it was running well for the HOT Arizona summer. While he was checking the car out, he noticed the problem with the hatch and saw that I had a stroller back there and used a piece of wood to keep the hatch open when taking the stroller out and putting it back it, so he replaced them for me!!! :)
Rear Hatch Struts/Shocks
Exterior Brainstorming - June/July 2009
As I said, I want this car to become a tribute to the Suns. I have always had the idea of putting the Suns new phoenix bird logo on the hood. First of all, I love that logo! Second, my mom and I have always had Camaros and my uncle used to have Pontiac Firebird Trans Ams. Firebird = Phoenix, so I saw the similarities between the Trans Am hood logo and the Suns logo. Since the Camaro and the FIrebird are basically the same car, and I got this Camaro from my uncle, I thought it would be appropriate to have my Camaro pay some homage to the Trans Am.
I have been playing around with some concepts for the exterior, incorporating the Suns logo. I can’t decide whether to keep it white or paint it orange. I love the “Tangelo Pearl” paint, and I hate that practically every Camaro you see in the Phoenix area is white. I want mine to stand out and really look custom. I’m not sure if the orange paint will be too much with the decal and/or racing stripes I am thinking of.
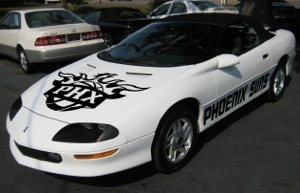
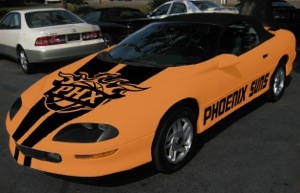
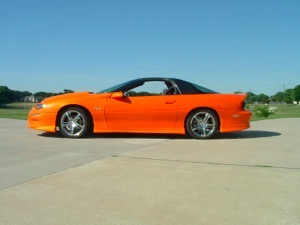
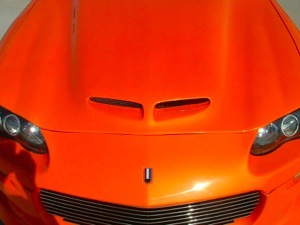
The image of the orange Camaro belongs to “Big Tymer” - his Camaro is painted the “Tangelo Pearl” by House of Kolor that I love so much. I cannot seem to get quite the right color on my photo editing software, but this last concept gives you an idea of what it might look like.
Below are more images of Big Tymer’s Tangelo Pearl Camaro


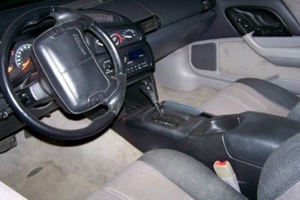
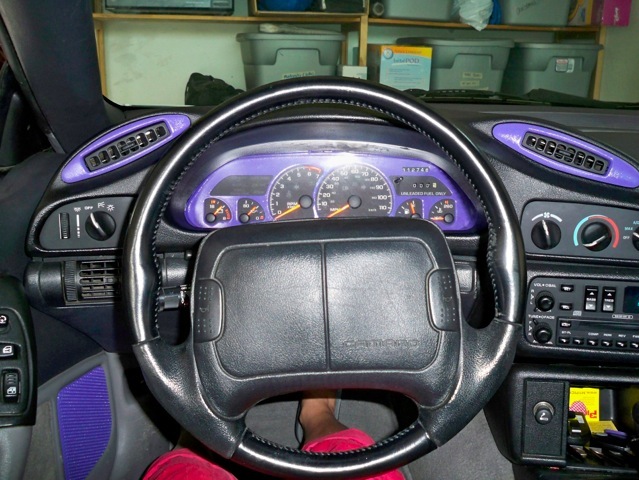
Steering Wheel & Shifter
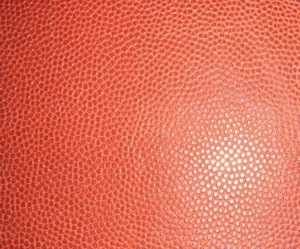
I have been looking everywhere for a steering wheel with leather basketball grip on it. I have no idea if something like this could be custom ordered for a reasonable price. I also wonder if I could purchase the basketball leather fabric somewhere and have someone re-cover my current steering wheel and shifter??? If anyone knows about this please clue me in!!!
Shifting Column - July 11, 2009
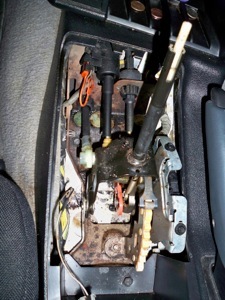
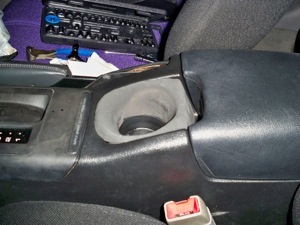
Can I begin by saying how much I HATE the cup holder (yes, one singular cup holder for a 4 passenger car) in the ’95 Camaro!!!
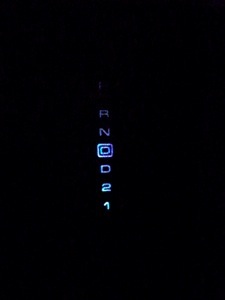
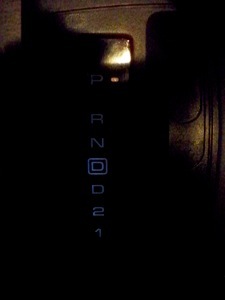
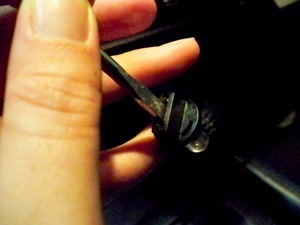
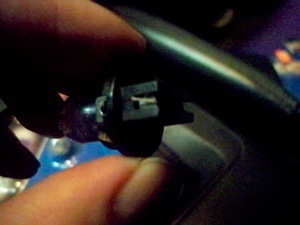
So, I have been curious about replacing the factory incandescent light bulds in the car with new efficient LEDs, so I decided to take the gear shifter apart to see how to change the gear indicator light. I also thought this would be a good place to start so I could take the shift knob off to se how difficult it would be to re-cover with the basketball leather. After I got the giant staple out of the back of the shift knob, taking the shifting area apart was quite easy, but what I found was disgusting!!!
The car has been difficult to shift for quite a few years - it gets stuck in park and you really have to bang on the shift button to get it to go to reverse or drive. The culprit of the sticky shifter was actually years of sticky Dr. Pepper that had been spilled down there because the cup holder doesn’t know how to properly hold a beverage!!! Yuck! I even made some money by taking it apart - there was some change stuck down in the gooey remains.
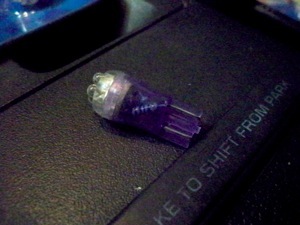
I cleaned up all of the pieces and will reassemble it when I receive the size 37/74 white LEDs I purchased on eBay today.

Keyless Entry - July 11, 2009
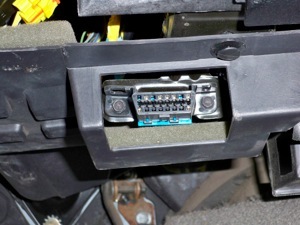
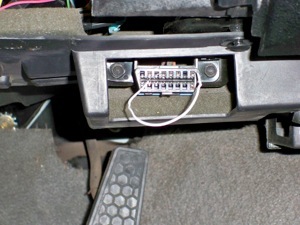
I joined a Camaro forum today http://www.camaroforums.com and I have wanted keyless entry for a while - it’s so annoying to have to lock and unlock the doors with the key every time - so I searched around on there expecting to find advice for a keyless entry kit that I could install myself. I saw the 16-pin electrical above the gas pedal and got excited that it might be where the keyless entry device plugged in.
As I did a bit more searching around the forum, I found out that in the 1995 Camaro there is a sticker in the glove box with codes for all of the parts/features that the car was equipped with from the factory. The code “AU0” apparently means the car has factory keyless entry installed, and my sticker had “AU0” on it! I found directions on how to test the car for keyless entry capability and programming factory remotes from “bluovlh8er” on the forum. I did his paperclip test, and my doors locked & unlocked, which meant that I did indeed have keyless entry installed on my vehicle!
I was planning on spending about $140 to get an aftermarket kit, but ended up buying two 1995 factory remotes (GM part # 10239647) on eBay - one for $14.99 & one for $17.99 (both including shipping), saving myself over $100 :) I will update you when they arrive!
Pics below are of the 16-pin electrical above the gas pedal and my paperclip test on them to discover that I have keyless entry.
Paint Happy? - July 12, 2009
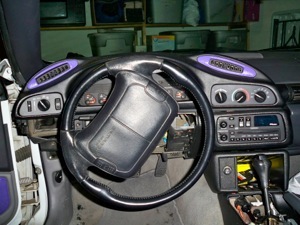
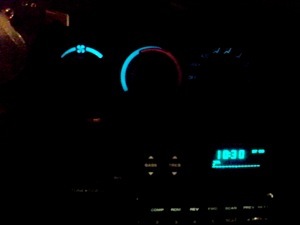
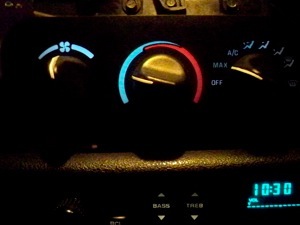
So I may have gone a bit crazy/overboard with the purple paint, but again, I LOVE IT! I started out yesterday by painting the plastic surrounds for the HVAC vents the same color purple that I did the speaker grilles.
When I was looking around on the internet, I saw that they sold chrome and other specialty colored surrounds for the gauge cluster area. Since I am planning on doing the purple LEDs for the gauges, which would show up at night, I thought the colored surround would be a great way to see the purple in the daytime when the gauge lights are not on, so I painted mine!
You may think I got a little paint happy, but I know I can still purchase all of these parts from my local Chevy dealer if I do not like the way it turns out. I don’t have it all put back together yet because I am waiting on the LEDs I ordered, but I think it will look really nice! It seems to really make the black gauges pop out with the contrast, similar to the look some people are going for when they put white or colored decals over the gauges.
It looks blue-ish in the photos, but I assure you it is purple - “grape” in fact.
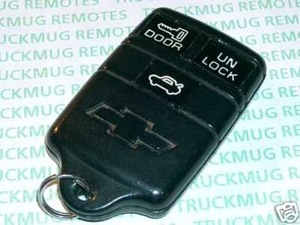
Keyless!!! - July 15, 09
We now have keyless entry for the Camaro after owning it for 10 years!!! This is one of the remotes I bought on ebay, and programming it with the paperclip was super easy :)
It works SO well, and I can’t believe I didn’t figure this out sooner!
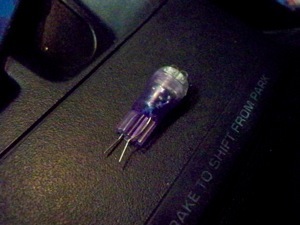
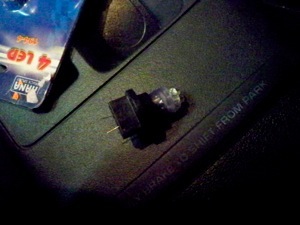
LED Interior Lighting - July 16, 2009
The Camaro Forum I joined has been so helpful this past week, and now that the first batch of my LED lights has arrived, here are the results:
These HVAC control lights have actually never worked for me - I didn’t even know there were lights behind there! I used white LEDs size 37 / 74 - they just plugged right in really easily.
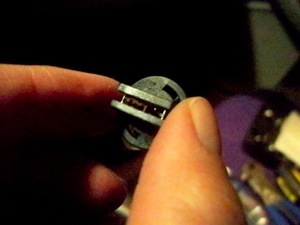
Shift gear indicator light (above) - takes just one size 37 / 74 - I used white.
To the left is the center console compartment light - it takes one size 194 / 161. I am not super happy with the brightness on this one - it’s a single. I have some quads on the way in the mail, so hopefully they will light it up brighter :)
Yes, I am an amateur - July 16, 2009
I am so absolutely sick of the pathetic cup holder in the Camaro, so I started thinking about ways I could possibly modify it without ruining my center console. I knew there must be some way to mold something in there to build it up so it would actually be tall enough to hold a cup! I first tried Sculptey Clay, which you have to bake for it to set, and it has a plastic-type texture after it is baked. It ended up sticking to the plastic in the console too much, so I couldn’t pull it back out to bake it.
The other clay-type products at the craft store all seemed to have a porcelain or ceramic texture when they set or dried, and I didn’t want that. In the kid’s Crayola craft section I found some air drying molding clay that dried to have a foam-like texture. I knew that wouldn’t stick to the car too much, and the air drying aspect seemed like it would be ideal so it could actually dry while it was in the cup holder of the car. So this is what I came up with:
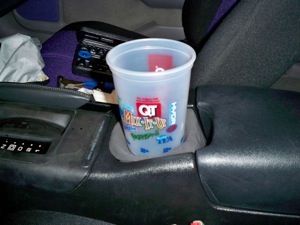
Don’t make fun of me! I know it’s really crappy looking, but it totally works!!! I tried it out today with a full 32 oz. drink from QuikTrip on a sharp turn and it stayed put!!! So now that I have the concept, if any industrial designers out there want to work with me to refine it just let me know ;)
(shortly after I did this, it stuck to the bottom of a QT cup and I accidentally threw it away)

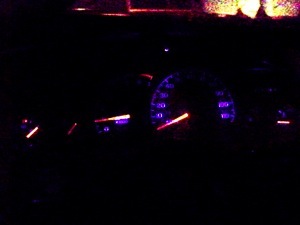
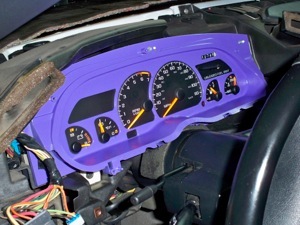
Purple LEDs - July 20, 2009
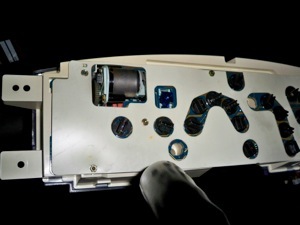
All of the LEDs I ordered are here now, so I took advantage of the slightly cooler temps because of the rain, and got to work on the gauge cluster.
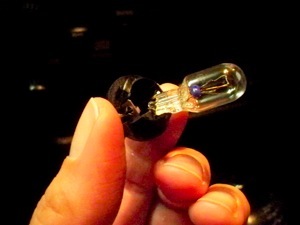
Taking the gauge cluster out was pretty easy after the black plastic dash pieces were off - it is just four 7mm bolts on the white plastic that need to come out. The light sockets twist out really easliy.
Once they are out, you need to pry out the current bulb. I found the easiest way to do this is to stick a flat head screw driver in the back and push, juggle, and crush the bulb out. If should pop part way out then you just have to pull it out the rest of the way. The wires will break off the bulb, and don’t worry about them - just leave them in the socket.
The new LED bulb’s wires need to be bent down, then it can be inserted into the socket. The wires need to then be bent down to the sides against the metal before being re-inserted into the gauge cluster panel.
And the resulting purple gauges:
After a 4 year and 7 month hiatus, this blog is coming back to life. One problem I see right away is that “Pimp My Ride” is no longer on TV, so we might have to change that:
My Suns Camaro never got its paint job, and it was put into storage when we moved out of that house in Feb. 2010. We have still continued to love Camaros as a family, and we talk about finishing it some day, but that project is on hold until we have a proper garage.
We now have two sons, Jackson, 7 and Chase, 3. Like most kids, they love to play the slug bug game, only they have added Camaros to their version of the game. They love anything having to do with Camaros, the Transformers movies and Bumblebee, and they like to see all generations of Camaros at car shows.
For about 4 years we have been talking about getting my husband a new body style Camaro for his 40th Birthday. Unfortunately, we didn’t quite make it - he’s about 2 years short of his 40th, and we bought a preowned 2011 Convertible 2LT yesterday!!! It’s silver with a black top, and I LOVE it! We bought it from a Toyota dealership that didn’t know much a bout the car, so we have been discovering new things about every hour. It’s about 3or 4 steps up from the base model. So far, the coolest thing is the HUD button. It brings up a screen on the windshield with your speed, etc. It’s totally scifi, like something out of a movie.
Enough talk - how about some instagram pics:
Back in the Camaro Game - Feb. 23, 2014


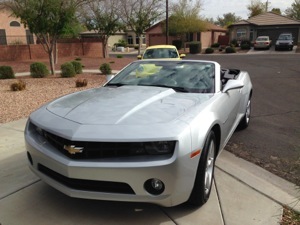
Driving it home from the dealership
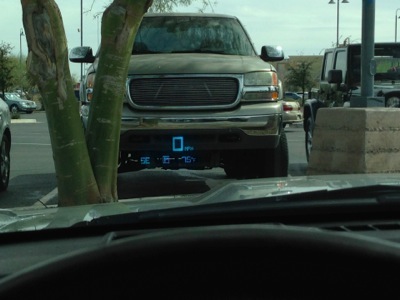
If you can tell what’s going on here, this is the HUD (Head’s Up Display). Clearly we are at 0mph because we are in a parking lot taking a picture ;) It is just the coolest thing, and I can’t wait to see it in the dark!
The Test Drive
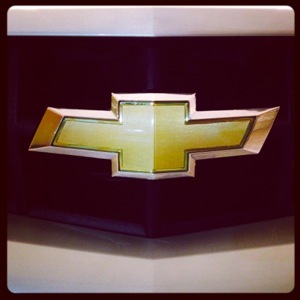
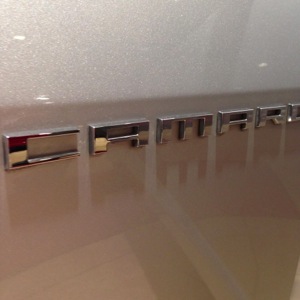
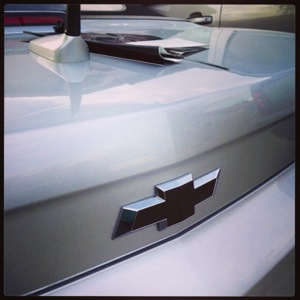
Trunk bowtie
Tail lights
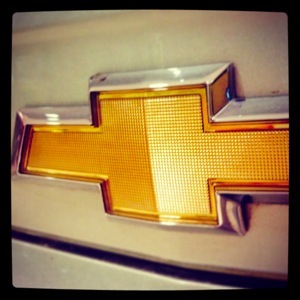
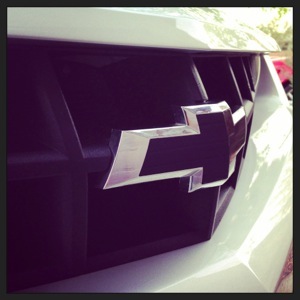
Grille bowtie
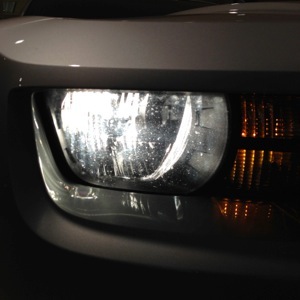
Head lights
In our driveway today!
This would not be a Pimp My Ride/Uverhaulin’ themed blog without some modifications, and we didn’t waste any time. This was just an experiment, so we may change it, but I got out my decal vinyl and turned the grille and trunk bowties black. We are thinking we may want them black carbon fiber instead, but they look pretty cool for now.
Black Tie Affair
I am excited to get this blog back up and running!